Jenkins Freestyle Job
In this walkthrough we'll create a new project (job).
Note that Jenkins GUI looks better in Chrome, so you can go ahead and install Chrome in your linux machine.
Create an example project
- Create the job
- Click on New Item
- fill my_freestyle in the top edit fiels (project name)
- Select Freestyle Project
- click on OK at the bottom
- Jenkins automatically lands on the new job configuration:
- Write something in the description window
- click on Save (the save button at the bottom)
- Go back to configuration by clicking at the configure button on the left
- Note that the sections on the left are just locations inside the long configuration page.
- Note that checkboxes can open a more configuration options
Add steps
- Scroll down and find Build Steps
- click the drop-down arrow and select Execute Shell
- Paste the following command in the edit windows:
1echo hello > /tmp/myfiles/hello
- Note that your command will not work, as there is no such a directory
- click the Save button at the bottom
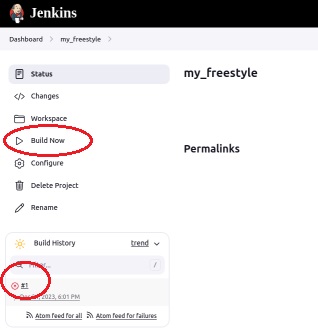
- Jenkins land at the job main page, so click on Build Now menu option on the left
- Your job appears at the bootom left, and seems to have failed.

Fix your job
- Click on Configure at the left to go back to configuration mode
- Add another step (which will appear after the first one), and paste the following:
1[ -d /tmp/myfiles ] || mkdir /tmp/myfiles
(we want to be able to run this multiple times and succeed)
- Now look for the menu sign (3 short line) left of the step name.
- Use it to drag the new step, and make it appear first, before the previous step.
- save
- Run your job again again
Build History
- Go to Dashboard level
- click Build History menu item on the left
- Explore the entries, and notice the output icon at the right side